
Easy Tricks To Create a Creepy Halloween Photoshoot
I’m amazed I made this happen! Here’s the story, I felt compelled to do a Halloween blog focusing on lighting a couple weeks back. As the deadline to actually make this blog happen drew closer, I was feeling uncomfortable with the idea.. I was certainly questioning my abilities and if my vision was strong enough to complete such a project. Like, I’m a fashion and beauty photographer! How the heck am I going to pull off a Halloween shoot?
When I had Maygen Kardash sign on to model and co-collaborate, it pushed me to set a date. When we started shooting, I went in with a loose shot list, and wanted to see how the shoot would progress. The first few tests I wasn’t sure this was going to work…but I kept pushing through determined to get at least a few good shots. Then the idea came together, the light was working, and I told the internal doubt to take a hike and just created, and it was SO much fun to try a completely different style of photography!
Here are my easy tips for creating a creepy Halloween photoshoot! I hope you enjoy the images, and comment below with which image is your favourite!
Happy Halloween friends, stay safe!

1. Location, Location, Location
Consider this - Backgrounds are the canvas for your portrait. Making sure you have the perfect setting and backdrop will make all the difference in your images. It’s worth taking the time to scope out spots.. I like to make an adventure out of it and go for drives with a coffee, or a long walk in the neighbourhood and it’s unlikely you wont find a great new location for your next shoot.
Halloween photoshoots call for a heavily wooded scene, tall grass, tall scraggly trees, something that just screams ‘I do not want to go in there’ vibes. This location was minutes from our house, near a small children’s playground in the Stonebridge neighbourhood of Saskatoon.
Hot Tip - Take your outdoor Halloween photos just after sundown. This will provide a little light in the background and contribute to overall image eeriness.
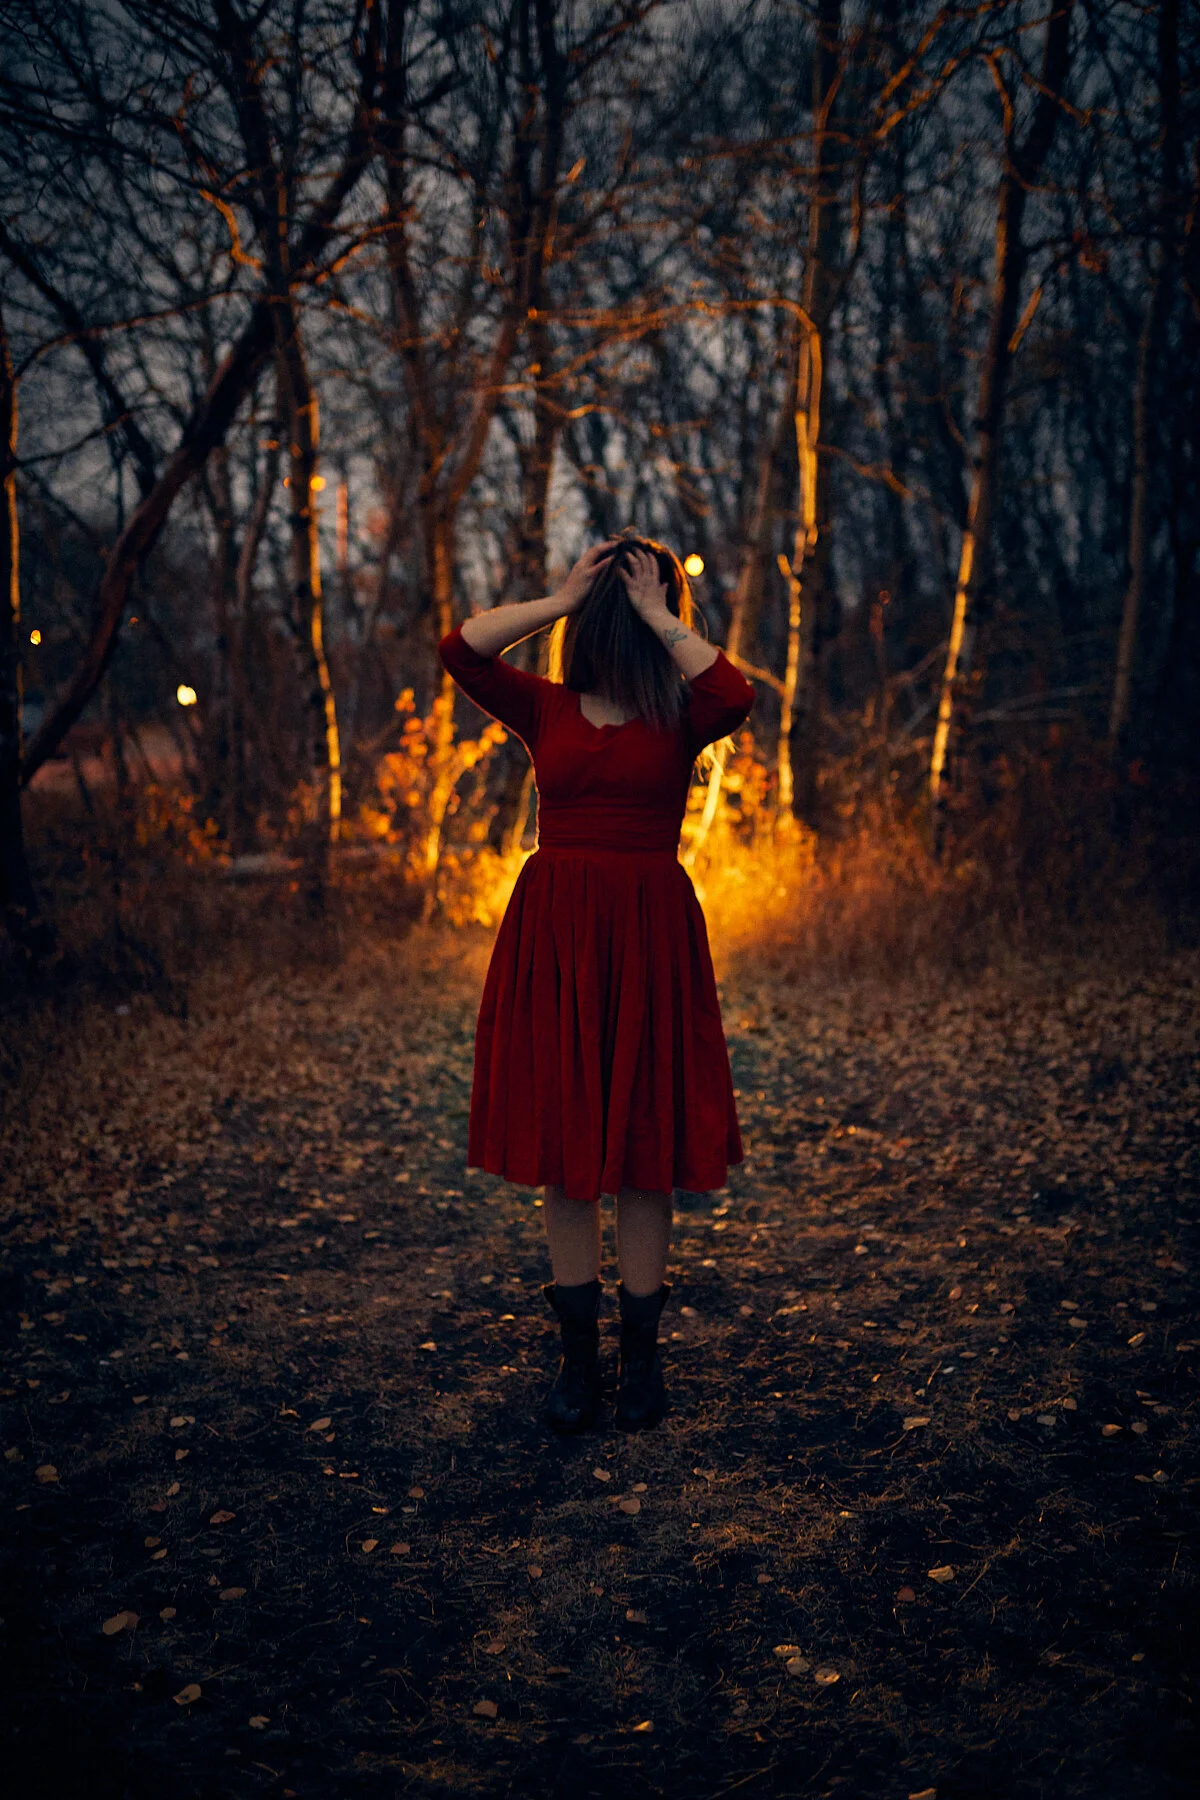

2. Posing
Now that we have the perfect canvas (background), we have to consider what our mood of the model or subject is. The two images above depict two different moods. One is more creepy than the other due to her hair covering her face, whereas the second image has an element of fear. It gives you the impression of being chased.
Always consider what the mood of the shot is as that will help you direct your subject.
Posing Ideas:
Have your subject run away scared
Shake their head
Hold their head
Stand with arms down by side, chin down, eyes on the camera, have a sinister smile
Creepily walk towards camera
Arms held out to sides, shoulders lifted, head down. Trying to replicate a monster like stance.

3. Add Props
Props will add believability to your images. They will also get your subject moving around and give them something to play and pose with. This is a good way to let your subject have fun and be creative. Good ideas for halloween props are: Masks, capes (we used a photo backdrop), lanterns, and candles.

4. Lighting
In the images above I used was a GODOX constant light with a Paul C Buff power supply. I had placed it on the ground behind Maygen to create a silhouetted look. I also added a yellow gel over the light to make it a warmer temperature.
When you’re working with a constant light, experiment with the placement of the light and the model. The image above I used the constant light on the side to create another interesting creepy effect.

5. Motion blur
Experiment with your camera by turning the shutter speed down. For this shoot I had my shutter turned to 1/30. Ask your model or subject to move slowly to create a blurred effect. Be sure to change your ISO to compensate for the additional light.


6. Experiment with flash and gels
The images are above were not tweaked in post and I simply used a flash aimed at the ceiling (in my powder room) with a red gel.
Hot tip - Another way to experiment with filters is by holding a red gel or something clear and red in front of the lens. I was also able to create a similar effect on my iPhone by covering the lens. Easy peasy.

6. Try editing in Black and White
Black and white is quick way to instantly create a mood or feeling. Black and white is accessible on all editing software and there are many presets available however not all black and white filters are good. I would select one that has deep blacks, high contrast, and grain which will give you that Halloween look.
Hot tip - Add vignetting to the image for added focus on the subject and visual interest. 👌

7. Fog Machine and car headlights
Turns out you don’t need high tech equipment to create a spooky image. This was created by using car headlights behind Maygen, and a rented fog machine (Long & McQuade on Broadway Ave in Saskatoon provided the one I used).
I did use an additional light on Maygen that was held by an assistant. He held the light in his arms and just feathered the light upwards.
I also shot this with a slower shutter speed to create a bit of blur (Camera setting ISO 800, 1/40s, F2).

8. Candlelight
This is a great and easy trick to do inside your home! Grab a candelabra, candlestick, or flashlight and find a dark hallway or stairwell. No need for additional lighting either! Just experiment with the height and placement of the candle to throw light on the model or subject’s face.

9. shadow play + Photoshop Editing
This is a fun one for the Photoshop inclined photographer. First you’ll want to place the light to cast a shadow on a building, garage, or home. You may want to use a tripod to get the background exact in each shot you take. Once you get the images you want you’ll bring both images into photoshop, paste one image on top and erase the image (top layer) to display the image below.
Thanks for reading! Comment below with your favourite image (I’m so curious which one you like best), and also grab your free photoshoot checklist below!